Java Development in Flex Builder.
Most of flex developer install the flex builder by selecting “Stand-alone IDE” configuration. While developing application using flex + java they have to depend on other editor or IDE. So here there is a way in which you can do the java development form the flex IDE.
There are two types of installation configuration when you install flex.
- Stand-alone IDE – This includes a customized version of Eclipse, and its own Java Runtime Environment (JRE). This version will not have java development tools preinstalled so you can’t do the java development. (For java development you need to install JDT (Java Development Tools)… which we will see later in this article.)
- Plug-in – This will install flex builder 2 Plug-in on Eclipse (if you are currently using Eclipse 3.1.2 /3.2 on Macintosh OS X.). With this installation you can do development on java and flex simultaneously form one IDE.
For updating Java Development Features in Flex IDE You need to install Java Development Tools (JDT) plug-in.
You can download & install the JDT plug-in from following location
http://easyeclipse.org/site/plugins/eclipse-jdt.html
Or
You can install JDT from Flex Builder.
Following are steps to install JDT form Flex Builder.
1. Open Flex Builder IDE.
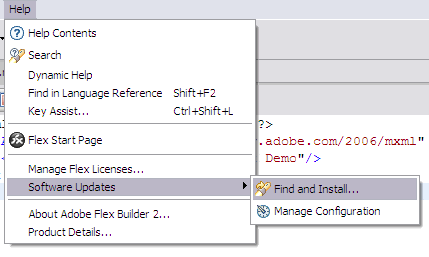
2. Navigate to: Help Menu >> Software Updates >> Click on Find and Install.
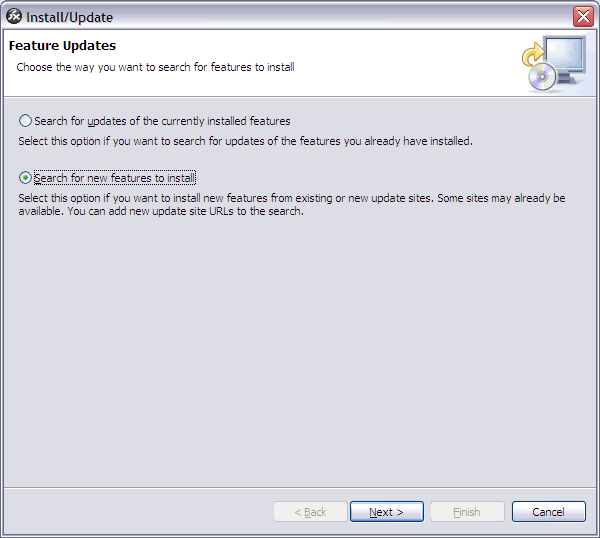
3. Now Install/Update Dialogue box will open. Select “Search for new features to install” and Click on Next button.
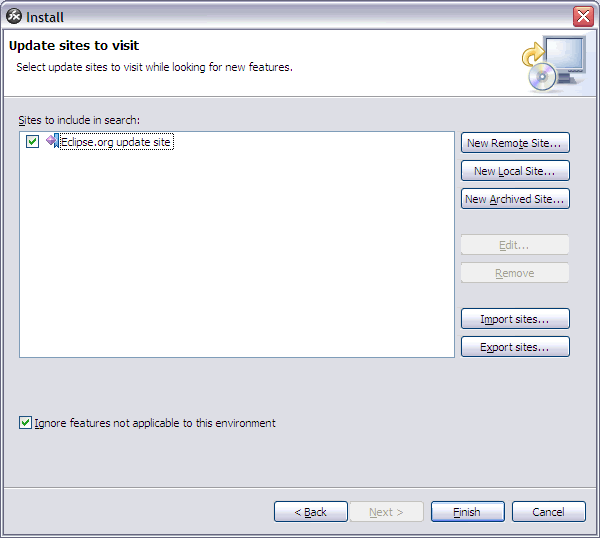
4. Now Install Dialogue box will open. Check “Eclipse.org update site” and click on finish button.
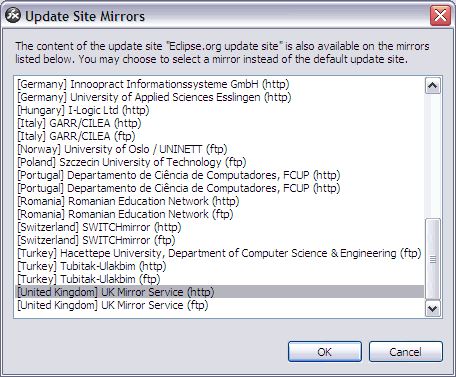
5. Now Update Manager will start searching Site Mirrors to download plug-ins and it will display “Update Site Mirrors” Dialogue box. Select any mirror site and Click on “Ok”
6. Now Update Manager will search for plug-in and open an update dialogue box. This dialogue box will list all plug-in for you current Eclipse version. Select “Eclipse Java Development Tools 3.1.2” and Press Next.
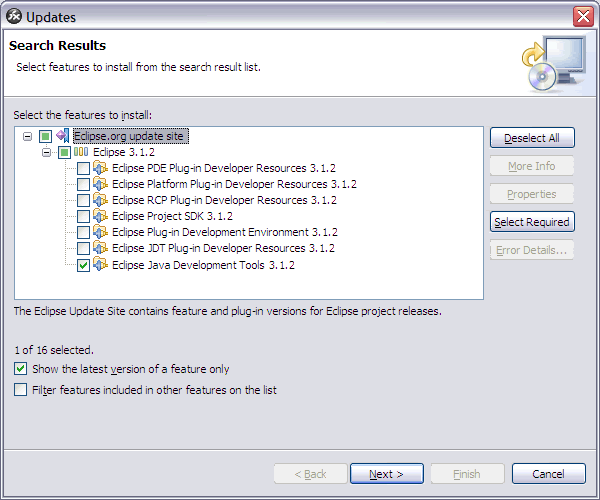
7. Now Accept the License Agreement and Click on next.
8. Select the installation path (By default it will be your Flex builder 2 directory) and Click on Finish.
9. Now JDT will be downloaded and installed. After installation you need to restart flex builder again.
Now you are done with the JDT installation.
To create a java project
1. Navigate to: File Menu >> New>> Click on Other…
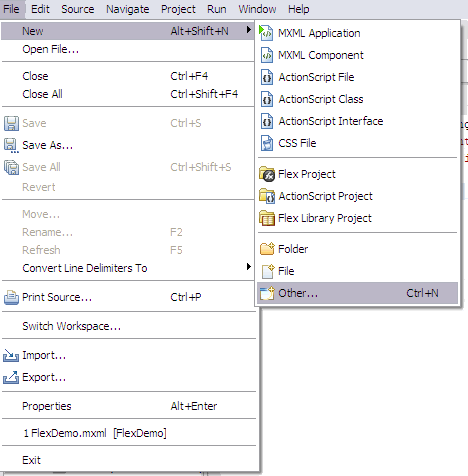
2. Now “New” popup window will open and you will see the you have a option to create a java project.
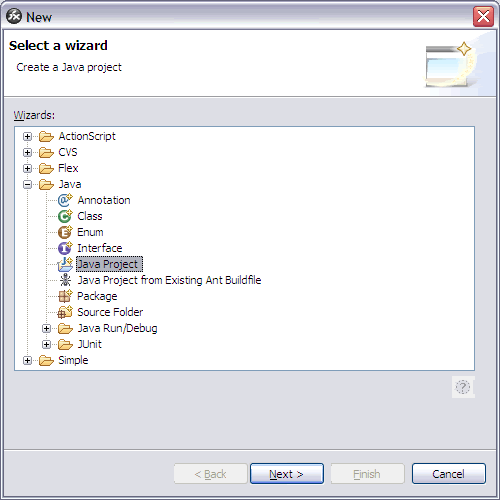
In this way you can create a java project and do java development.
Hope this article will help some flex developers.
Enjoy Flex + Java Development…. ![]()
Flex 3 for You ********* June 10, 2007
Posted by suketuvyas in : Flex 3 , add a commentFlex 3 Beta 1 is released and it is available for download in Adobe Labs.
Some Important Links for Flex 3:
DOWNLOAD FLEX BUILDER BETA 1
DOWNLOAD FLEX SDK BETA 1
LABS WIKI FLEX 3
Flex Bug Database
Flex Standards and Community Process
12:33 PM
|
Labels:
Flex Components Downloads
|
This entry was posted on 12:33 PM
and is filed under
Flex Components Downloads
.
You can follow any responses to this entry through
the RSS 2.0 feed.
You can leave a response,
or trackback from your own site.


0 comments:
Post a Comment